In this section we will cover how to view, add, delete, or modify user accounts; how to assign different roles for users; and how to configure a user to be a default sender for different types of messages, which may be useful to allow optimal distribution of the correspondence between staff.
To view a list of users select “Administration”> “Edit users”.
You will be able to see all current users, edit each of them, or add a new one if you have appropriate permissions. Click "View Permissions" button to see what options are available for you.
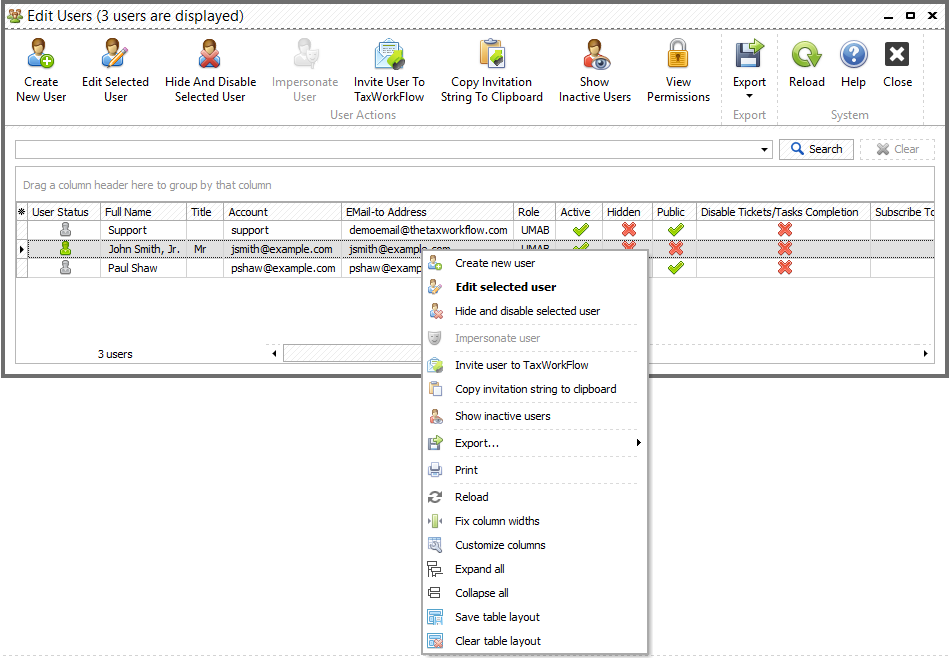
To add a new user, click your right mouse button and select a “Create new user” drop-down menu item. To edit an existing user select an “Edit selected user” item in the same menu or double-click on the row with the user you want to edit. Also you can use buttons on the top of the form to work with users. Below is the “Edit user” form example:
This form contains several tabs with the following fields:
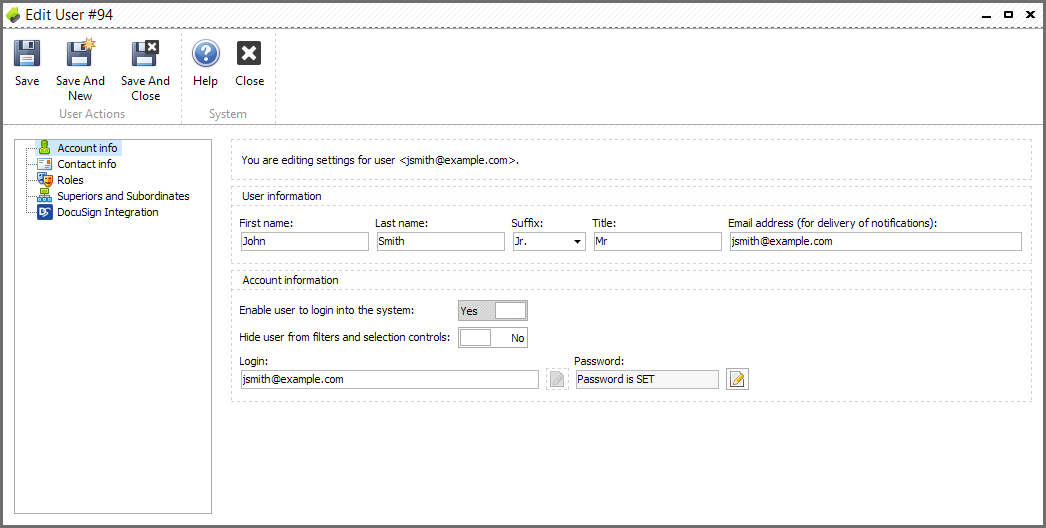
Account info:
1.User’s “First name” and “Last name”. You can also add user's suffix and title.
2.User’s “Email” address. This address will be used to send email notifications to this user, such as invitations or notifications. Please, note, notifications about some activity won't be sent to user who produced this activity.
3.“Login” and “Password” to allow users to login into the system. If you do not specify a user’s login you will not be able to assign any role to this user and they cannot log in to the system. The “Password” field is mandatory.
4.“Enable user to login into the system”. Change it to "No" to forbid user to login into the system.
5."Hide user from filters and selection controls". Change it to "Yes" to exclude user from user lists.You will not be able to select him/her in any projects/tasks or other program functions.
Contact info:
1.User's contact info.
2. The office user is assigned to.

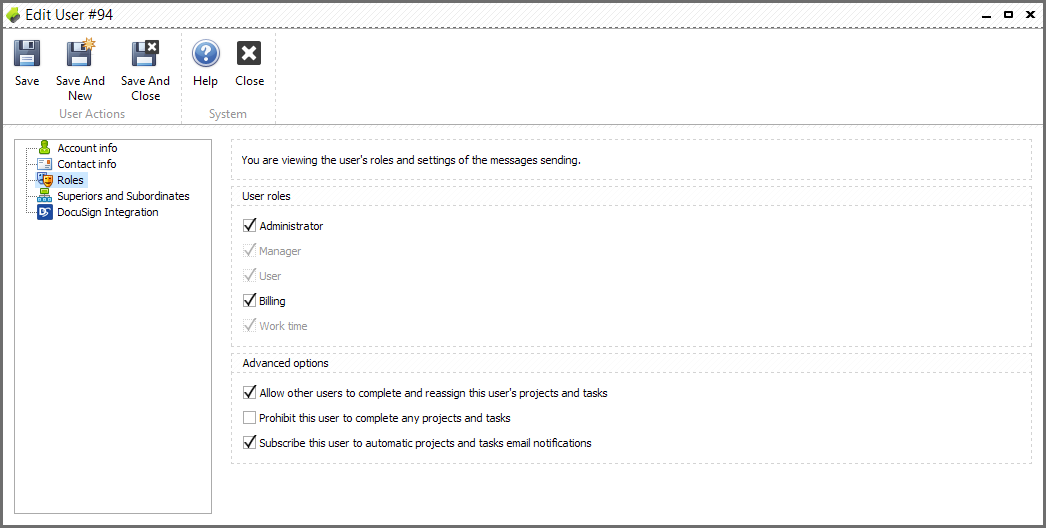
Roles:
1.“User roles” - There are four user roles that can be assigned:
•Administrator. Administrators have access to the “Administration” menu item where they can perform various workflow, document, and user management tasks such as sending invitations and editing project/task templates/properties, document/problem categories, problem templates and problem triggers. Only administrators can update the database version and define global templates and company-wide parameters (such as authentication methods or office names). Administrators can also perform as Managers.
•Manager. Managers organize, assign, review, and monitor execution of various tasks and projects across many users. They can also communicate with customers via email and mail campaigns.
•User. Users primarily work on their assignments and documents. Hence, they cannot complete or begin someone else’s projects or tasks (unless reassigned), and they also can't run mail or email campaigns. Users cannot delete already uploaded documents, prioritize someone else’s projects or tasks, or delete any project.
•Billing. This is an additional permission which allows to work with Billing/Invoicing module and can be combined with any role described above.
•Work time user. This is another additional permission which allows users to control only their own work time and view in read-only mode other user's work time.
2.Advanced options:
•"Allow other users to complete this user's projects and tasks" should be unchecked if you don't want other users complete projects and tasks assigned to this user.
•“Prohibit this user to complete any projects and tasks” can be checked if you don’t want the user to close any projects or tasks. This option may be useful for education purposes, i.e. for trainees or outsourced staff.
•"Subscribe this user to automatic projects and tasks email notifications" should be checked to allow user to receive email notifications regarding tasks and projects.
Superiors and Subordinates:
Here you can manage relationships between users.
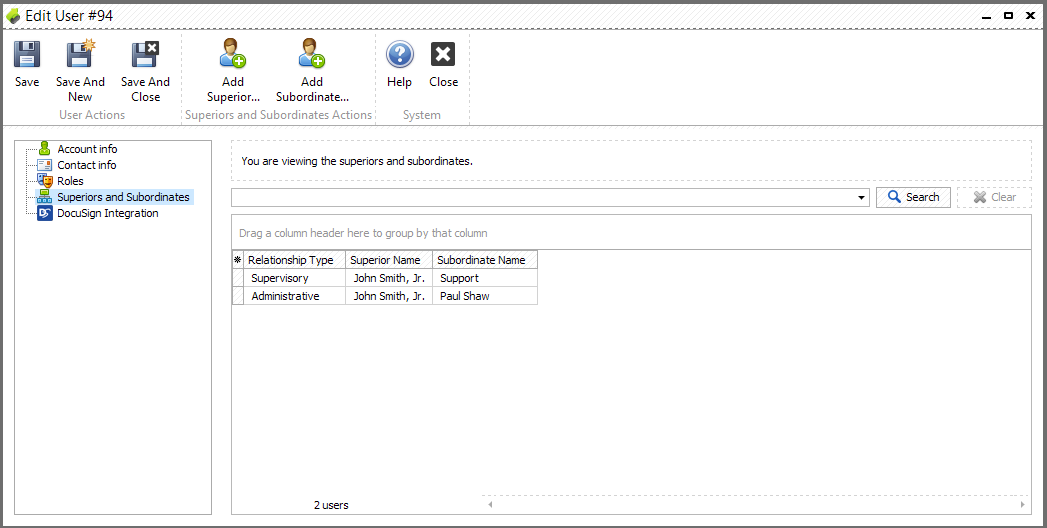
To add a superior for selected user click "Add Superior" button:
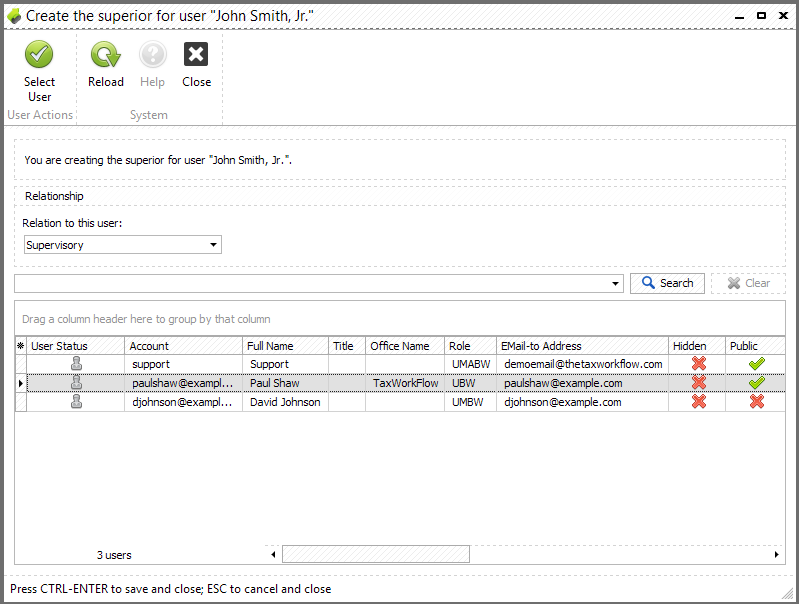
Select a user (superior) from the list and a relation from the drop-down menu. There are following relation types available:
•Supervisory
•Client Billing
•Administrative
Please note, each user can have only one superior of each type.
To add a subordinate for selected user click "Add Subordinate" button:
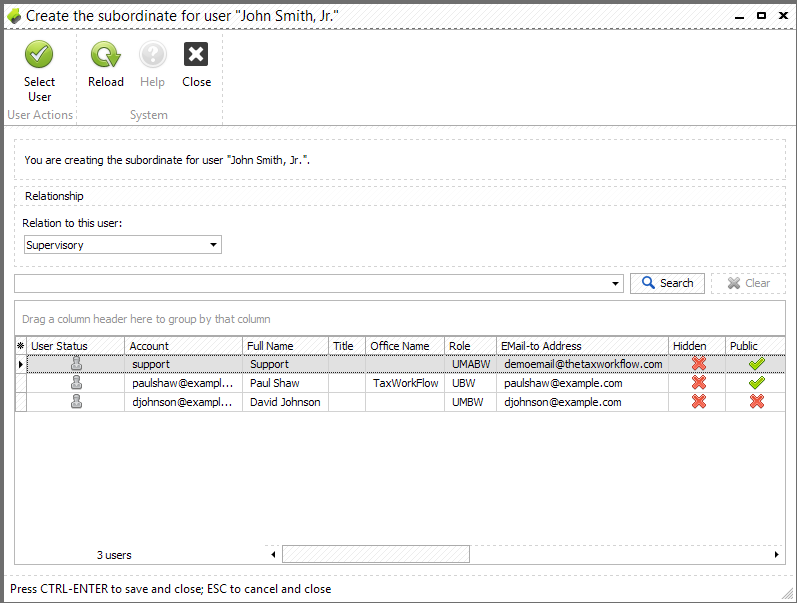
Select a user (subordinate) from the list and a relation from the drop-down menu. There are following relation types available:
•Supervisory
•Client Billing
•Administrative
Please note, you can't select user's current superior as his/her subordinate.
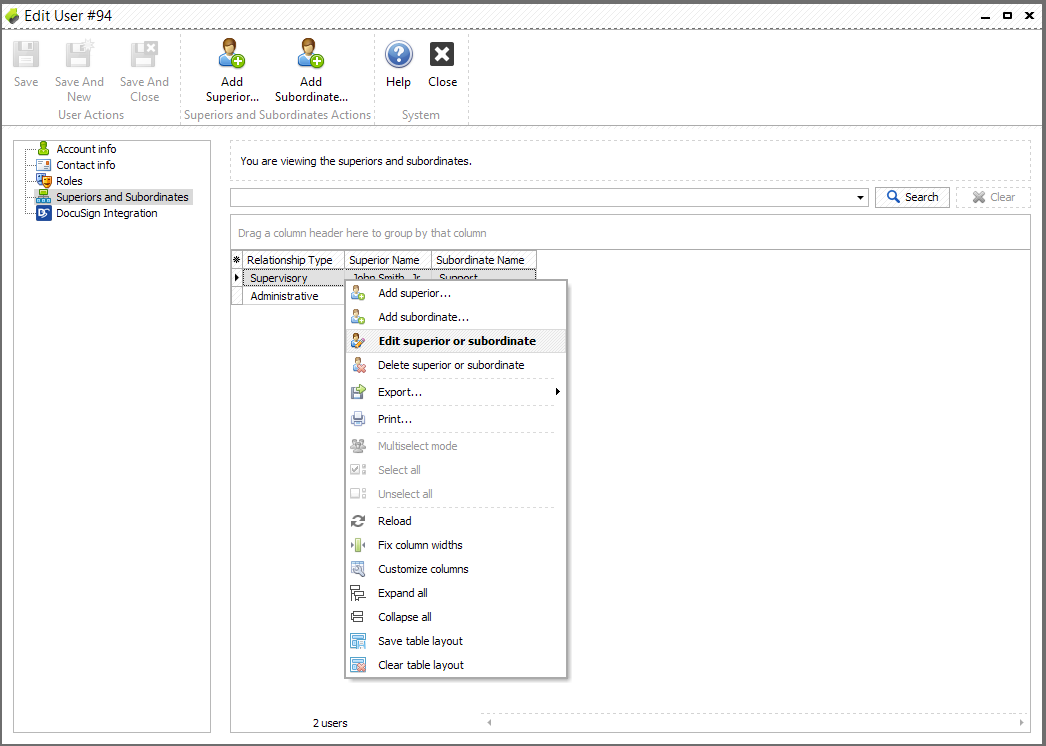
To edit existing relations double-click on the user from the list of superiors/subordinates or click right mouse button and select "Edit superior or subordinate":
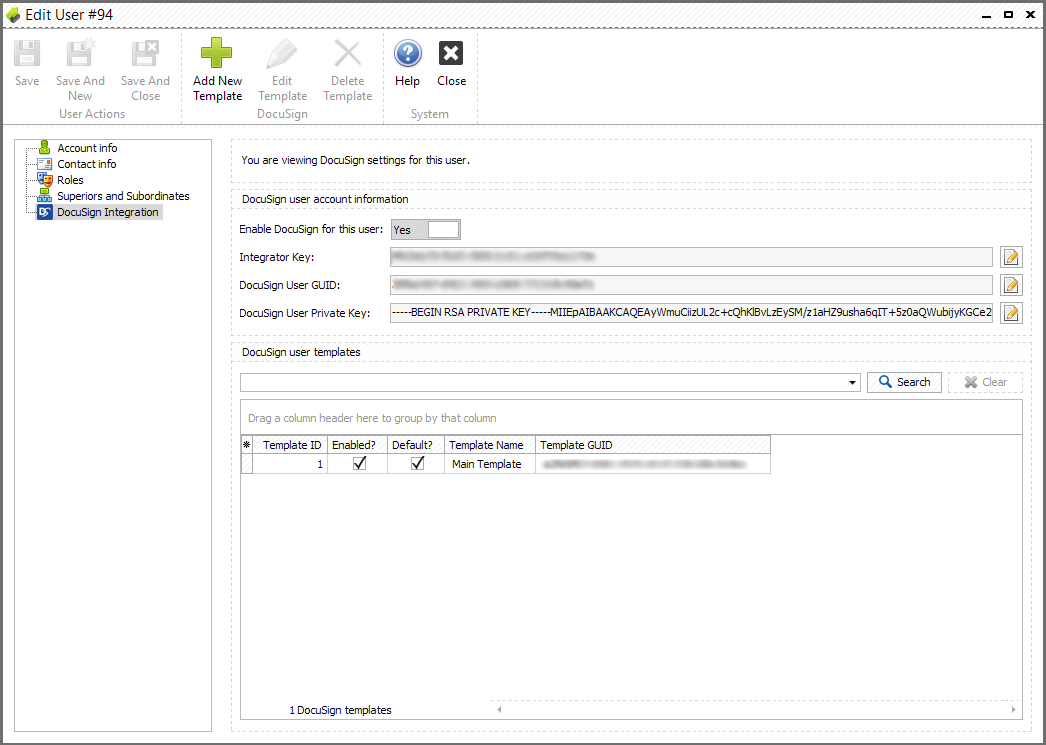
DocuSign Integration:
In this tab you can turn on and setup DocuSign for the user. Find more information on this feature in "DocuSign integration" chapter.