To manage the connection, or add, remove, or edit other connections, select the
“File>Edit connections” menu item.
You will see the “Edit connections” form:
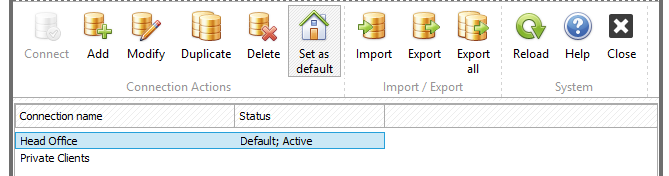
From here you are able to add, modify, duplicate, or delete connections, to set the selected connection as the default and to import or export connections. The default connection is established automatically when you launch the application. This gives you the opportunity to start with the most commonly used database.
In regard to importing and exporting connections, if you were a TaxWorkFlow beta tester, you received an INI-file containing connection settings that you can import into the system using the “Import” button from the form above. Click it, then choose the INI-file, enter the connection name and you will see it in the list of existing connections.
If you wish to work with the program from more than one computer, you may export your connections to a REG-file. Click the “Export connection to REG-file” button to export the selected connection or the “Export all” button to export all existing connections. Once you’ve exported connections you can copy the resulting REG-file to another computer and run it in a Windows environment by double-clicking on it from Windows Explorer. This should write connection settings to the registry and you will be able to see them in the connection list when you launch the program on your other computer. You can also send an invite to yourself to make it easier.
To add or modify connections, click the “Add” or “Modify” buttons you will see on the following form:
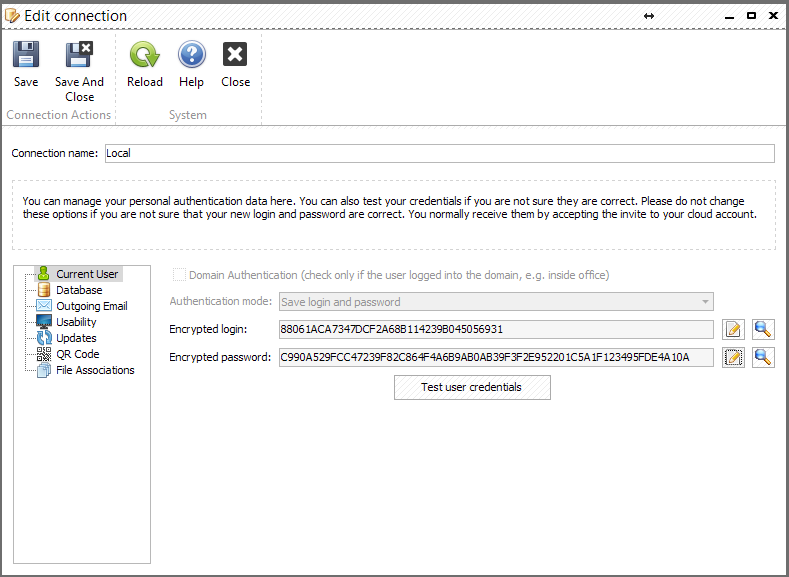
First, specify a unique connection name. You will not be able to save settings if the “Connection name” field is empty. There are seven tabs in this form containing different settings. On the “Current user” tab you may set your preferred settings for the TaxWorkFlow application that will apply only to this particular installation. It contains following fields:
•“Domain Authentication”. This feature is used by large organizations that have their own domain in their office. It provides additional security and user management benefits. Most smaller office users will not have this installed in their firm. Please contact us at support@thetaxworkflow.com if you wish to have the domain integration enabled.
•“Authentication mode” options provide you with extra security when many other people have access to your account on your computer (i.e. there is no login password on your workstation). You can select one of three modes from the list:
•1) “Save login and password” where both the login and password will be stored in the system registry in the encrypted form. This is the default option and that allows you to immediately establish the connection to the account from saved account credentials.
•2) “Save login only” saves only the encrypted in the system registry, so the system will prompt you for password when you launch the application.
•3) “Always prompt for login/password” makes you always enter both login and password manually at application startup.
•“Encrypted login” – encrypted user login. Click the magnifying glass icon to decrypt in order to see your current values, or click the pencil icon to modify it.
•“Encrypted password” – encrypted user password. Click the magnifying glass icon to decrypt it or the pencil icon to modify it.
•“Test user credentials” allows you to check if all user settings are correct and the connection works properly.
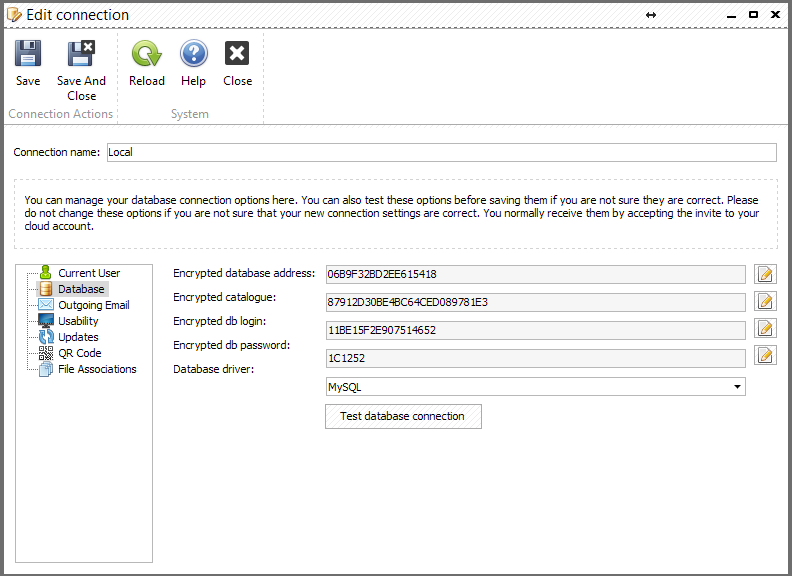
On the “Database” tab you may set the database connection settings:
All of these settings will be available to you when you create an account with us via the previously described invitation.
You will most likely never modify these fields unless you are moving to another account or server. This form contains following fields:
•“Encrypted database address” – encrypted internet address of database in the cloud
•“Encrypted catalogue” – encrypted path to your database name
•“Encrypted db login” – encrypted database user’s login
•“Encrypted db password” – encrypted database user’s password
•“Database driver” – select “Microsoft SQL Server” or “MySql” database driver from the list. It may be needed to manually install the driver if you choose it after the installation of the TaxWorkFlow application.
•“Test database connection” allows you to verify if all database settings are correct and the connection is available.
On the "Outgoing Email" tab you may set existing email account settings to use for outgoing email notifications (for example, in email campaigns or reminders).
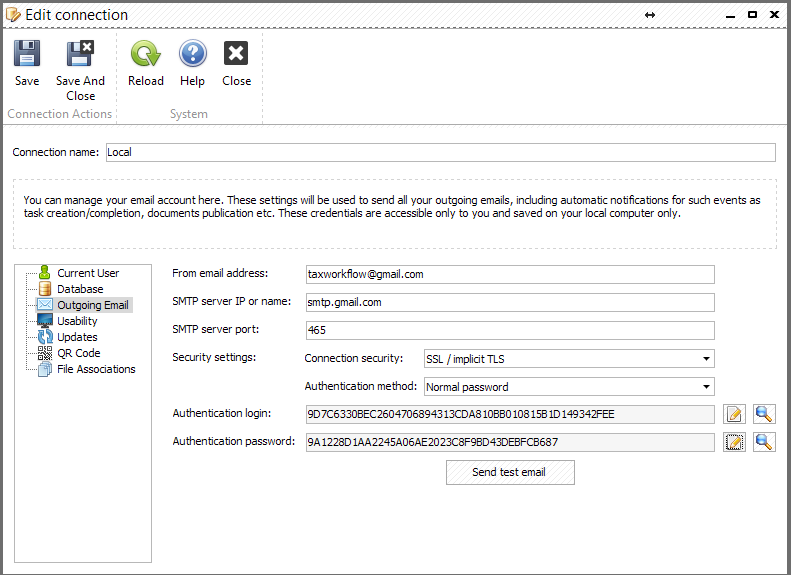
The form contains the following fields:
•“From email address” – specify your email address here
•“SMTP server IP or name” – specify the IP address or domain name of the server your email account is registered at
•“SMTP server port” – depends on your POP and SMTP server’s settings (it is not recommended to use 25 port for the SMTP server, as it provides no encryption of the outgoing emails and can be subject to identity theft)
•"Connection security" - depends on your SMTP server’s settings (SSL/TLS is recommended)
•“Authentication method” – depends on your server’s settings
•“Authentication login” – encrypted user login to the SMTP server. Click the magnifying glass icon to decrypt it or the pencil icon to modify it
•“Authentication password” – encrypted user password to the SMTP server. Click the magnifying glass icon to decrypt it or the pencil icon to modify it
If you are using a common post servers such as Gmail, AOL, etc. you can find the values to put in the fields listed above on your post server’s settings pages. Please refer to your email provider for these settings, or email us for help setting up your account if you experience issues with a certain mailbox.
For example, here are the sample settings for a GMAIL email account:
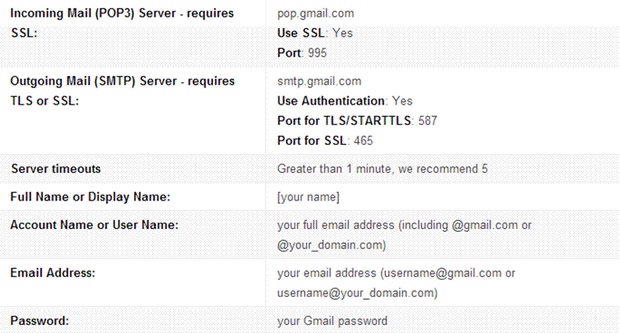
To make sure everything works press “Send test email” button, enter an email where you want to send a test message, press “OK” and check the email for test message. Check "Email sync troubleshooting" topic if you have some issues setting up email.
The next tab is “Usability” tab:
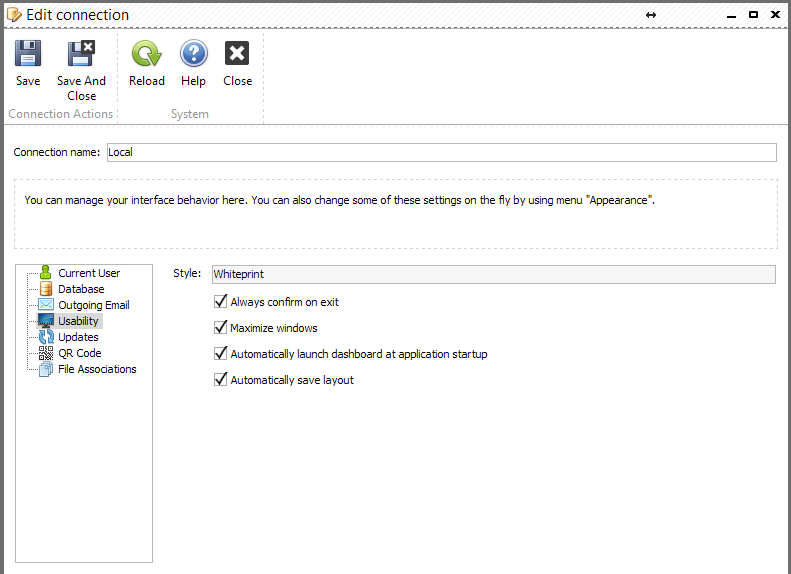
•“Style” – select a style you prefer from the list. You may wish to select the style that gives you the best visual delivery so you can work more productively.
•“Always confirm on exit” – the system will always ask you for confirmation before quitting the application.
•“Maximize windows” – all TaxWorkFlow windows opened will be maximized automatically. This helps optimize the usage of your screen.
•"Automatically launch dashboard at application startup" - Dashboard starts automatically by default. You can find more information about it in Dashboard chapter of this guide.
•"Automatically save layout" - save the layout for the chosen connection automatically.
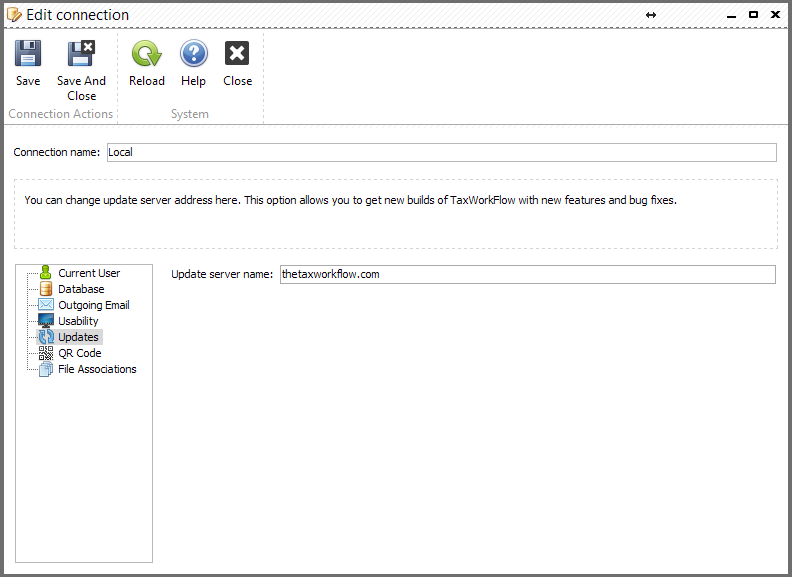
“Updates” tab contains only one field: “Update server name”. Enter “thetaxworkflow.com” value here to allow the system to be updated from the original TaxWorkFlow server if newer releases are available.
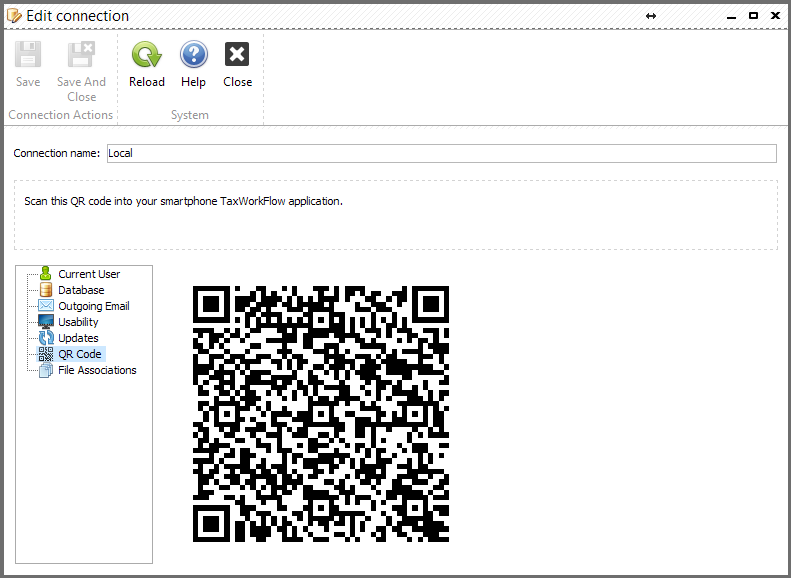
"QR Code" tab contains the QR code that can be scanned from your TaxWorkFlow iOS or Android application. This code allows you to connect to your database from the mobile application.
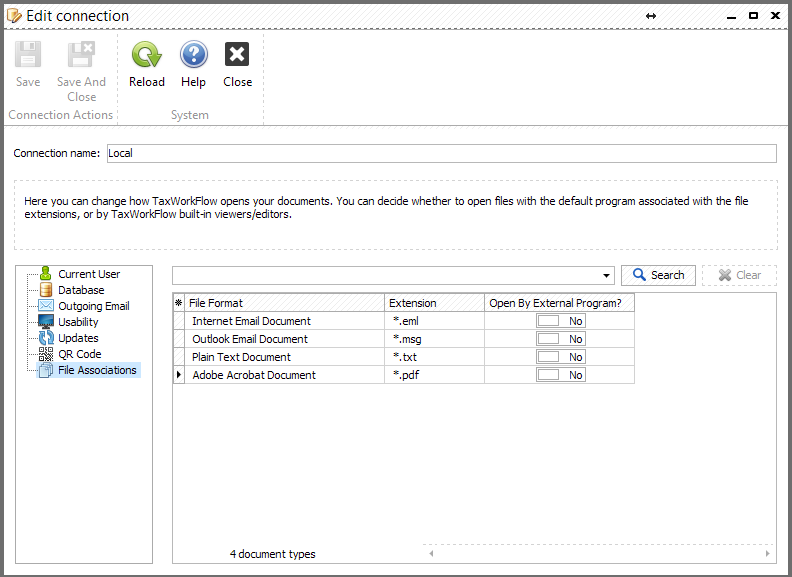
"File Associations" tab allows you to select what file types you would like to open by external applications when you open them from TaxWorkFlow. By default all these file types are opened inside TaxWorkFlow but you can change these settings in this tab and open some file types by your default Windows program: